Overcoming a Dynamic IP Address with DuckDNS
Motivation
So you have chosen to deploy your application on AWS or perhaps you have turned a spare computer of yours into your home server. You are finally deployed and users can finally access your site! I mean, the address for your site may be something weird like http://123.0.0.321 but at least someone can access your site right?
Well, if you ever have to restart your server to make updates or save some computing power when nobody is using your server, you may find that the next time you boot the server up, the IP address of your deployment has changed! Now you have to tell everyone your application has a new URL. This is because most hosting options (especially the free/low-cost options) give your production server what is called a Dynamic IP address. In other words, services like AWS or your Internet Service Provider (ISP) assign a new public (or external) IP address to your server whenever it boots up and joins the network. This is often done to save resources as an IP not used by one person can be used by another.
While you could contact your hosting service or ISP to make it so that the external IP address of your server, which everyone connects to, stays fixed, this can either be quite a hassle or cost you money (something most students don’t have to spare!). To get around this problem, one can turn to a Dynamic DNS provider. A popular choice of such a provider, among amateurs and hobbyists, is a service called DuckDNS.
What is DuckDNS?
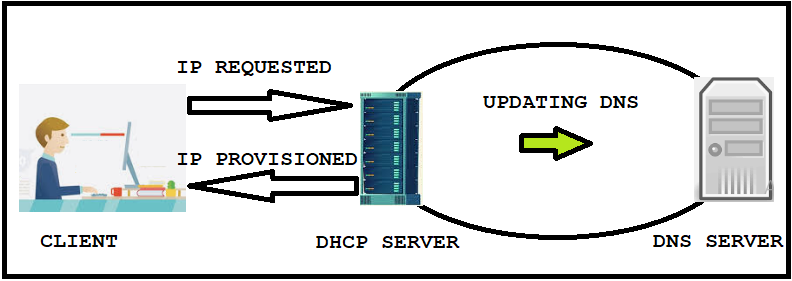
DuckDNS is a Dynamic Domain Name Service provider. In other words, they are a service that maps domain names to dynamic IP addresses. When using DuckDNS, your application gets a domain name. As it is a free service however, this name will be a subdomain of DuckDNS (e.g. http://my-cool-application.duckdns.org). More importantly however, this name will not change. DuckDNS then provides a script you run on your server that tells DuckDNS what the external IP address of your server is. This script is configured by default to run every 5 minutes.
To summarize what DuckDNS does, whenever a user tries to navigate to your application, as part of resolving the domain name of your application, the user asks DuckDNS what the IP address is of your application. Since you constantly update DuckDNS with your application’s IP address, the user is up to date with your server’s address even if it changes.
How do I use DuckDNS?
Using DuckDNS is very straightforward. You can sign up by logging into your X (formerly Twitter), Github, or Google account. You are then taken to a homepage that shows your account token and the domain name mappings you created. Simply create a new domain name for your application. You do not need to set your application’s IP address on this page (the script that will be run does that for us).

Note: it is important to keep your account token secret. If someone ever manages to get access to your account token, they can use it to redirect your users to their site!
In order to keep DuckDNS up to date, you then need to have your server run a script to tell DuckDNS what its external IP address is. The simplest way to do this (if your server is running on linux) is through the use of a cron job. To do so, on your server:
-
Create a folder anywhere called
duckdns. -
Navigate into the
duckdnsfolder and create a file calledduck.sh. -
Paste the following into the
duck.shfile substituting values where appropriate:
echo url="https://www.duckdns.org/update?domains=<YOUR COOL DOMAIN NAME>&token=<YOUR ACCOUNT TOKEN>&ip=" | curl -k -o <PATH TO FOLDER>/duckdns/duck.log -K -
-
Make the
duck.shfile runnable by runningchmod 700 duck.sh. -
Next, add a job to the running cron process by running
crontab -eand pasting*/5 * * * * <PATH TO FOLDER>/duckdns/duck.sh >/dev/null 2>&1at the bottom of the crontab. This makes theduck.shscript run every 5 minutes. If you wish to modify how often this script gets run this guide explains the crontab syntax to do so. -
After saving the file, we can finally test that the script works by running
./duck.sh. This should create a file calledduck.logwhich contains the result. If by runningcat duck.logyou getOKthen you are all good to go! If you getKOas output, ensure you copied everything correctly.
If you have an issue getting the cron job to work, the node package pm2 is helpful in ensuring the duck.sh script always runs at boot and every 5 minutes thereafter (or however often you desire). For more details on these instructions and other methods of running the update script on various other devices, visit the DuckDNS installation page.
A Note for Home Servers
Since DuckDNS updates your external IP address, this will usually refer to your home router. This will be different from the actual IP address of your device on your home network that is running the server. After setting up DuckDNS, in order to tell your router to forward data to where your actual server is running you will need to do port forwarding. More information about what and why you would do this and how to set up your router for port forwarding can be found here
External Resources
- For more details about DuckDNS and any privacy concerns you may have, visit the DuckDNS website.
- For more details about what and why would you need to use a dynamic DNS, Cloudflare has a good article on the subject.
- If you are not comfortable with using DuckDNS, another popular dynamic DNS provider is noip.