Outline for Trello Use in Software Project Management
Table of Content
Introduction
Getting Started with Trello
Setting up Your Trello Board
Best Practices for Managing Tasks
Enhancing Collaboration with Trello
Integrating Trello with Other Tools
References
Introduction
In the dynamic world of software development, effective project management stands as a cornerstone of success. Among the plethora of tools available, Trello emerges as a remarkably intuitive and flexible platform designed to streamline task organization and enhance team collaboration. With its visual boards, lists, and cards, Trello offers a user-friendly interface that caters to the planning and execution needs of software projects of all sizes.
This guide is tailored specifically for CSC301 students and anyone interested in harnessing the power of Trello to optimize their project management practices. Our objective is to provide a comprehensive overview of Trello’s capabilities, from setting up your first board to employing advanced features that facilitate seamless collaboration among team members. Whether you’re undertaking a group project, managing assignments, or coordinating with a development team, this guide aims to equip you with the knowledge and skills to leverage Trello effectively, ensuring your projects are not only well-organized but also completed efficiently and successfully.
By the end of this guide, you’ll have a solid foundation in utilizing Trello for software project management, enabling you to navigate your projects with greater ease and confidence.

Getting Started with Trello
To effectively utilize Trello for your software project management needs, familiarizing yourself with the platform’s basics is essential. This section will guide you through the initial steps of getting started with Trello, from signing up to navigating its interface efficiently.
Signing Up for Trello:
- Begin by visiting the Trello website and signing up for a new account. You can sign up using your email address or directly through your Google or Microsoft account for added convenience.
- Once your account is created, Trello will prompt you to create your first board, which is your workspace for organizing tasks and projects.
Understanding the Trello Interface
- Boards: The heart of Trello, boards are where your project’s tasks (or cards) are visually organized. Each board represents a project or a significant component of your work.
- Lists: Within each board, you can create lists to categorize tasks based on their status, such as "To Do," "In Progress," and "Completed." Lists help in tracking the progress of your project.
- Cards: The basic unit of tasks within Trello. You can add cards to your lists, representing individual tasks or items that need attention. Cards can be moved between lists as their status changes.
- Features for Collaboration: Trello allows you to invite team members to your board, assign tasks to specific individuals, and communicate through comments on cards. It's a centralized space for your team to collaborate and stay updated on the project's progress.
Navigation Tips:
- Utilize the menu options on the right side of the board to access board settings, add team members, and integrate with other apps.
- Explore keyboard shortcuts in Trello to speed up your workflow. Trello offers a variety of shortcuts
for common actions, which can
enhance your efficiency.
Setting up Your Trello Board
A well-organized Trello board is pivotal for effective project management. This section outlines step-by-step instructions to create a Trello board specifically designed for your software project, and how to utilize lists and cards to maintain an organized workflow.
Creating a Trello Board
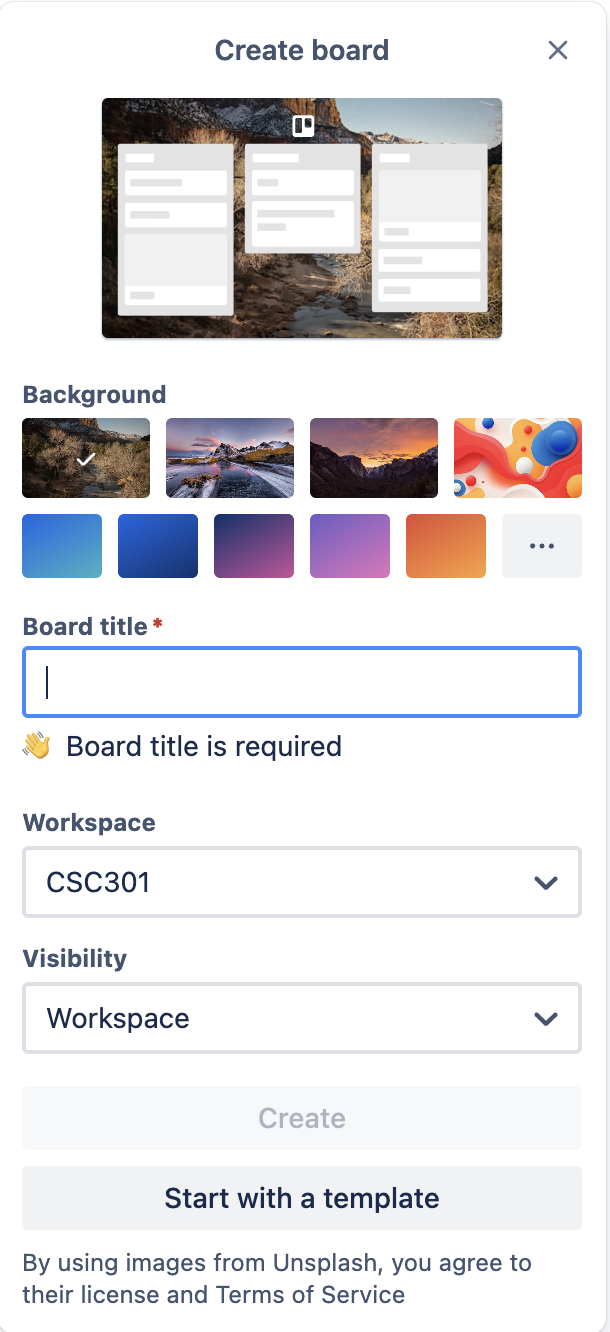
1. Navigate to Your Dashboard: Log into your Trello account, and on the dashboard, click the "Create" button on the top left corner of the screen, then select "Create Board".
2. Board Configuration: Assign a name to your board that reflects the project or task theme it will manage. Choose a background color or image for visual distinction.
3. Privacy Settings: Decide on the board's visibility. You can set it as private (visible to you and anyone you invite), workspace (if you're part of a Trello team), or public (visible to anyone with the link).
4. Create the Board: Click “Create” after configuring the settings. Your new board is now ready for customization and task management.
Setting Up Lists
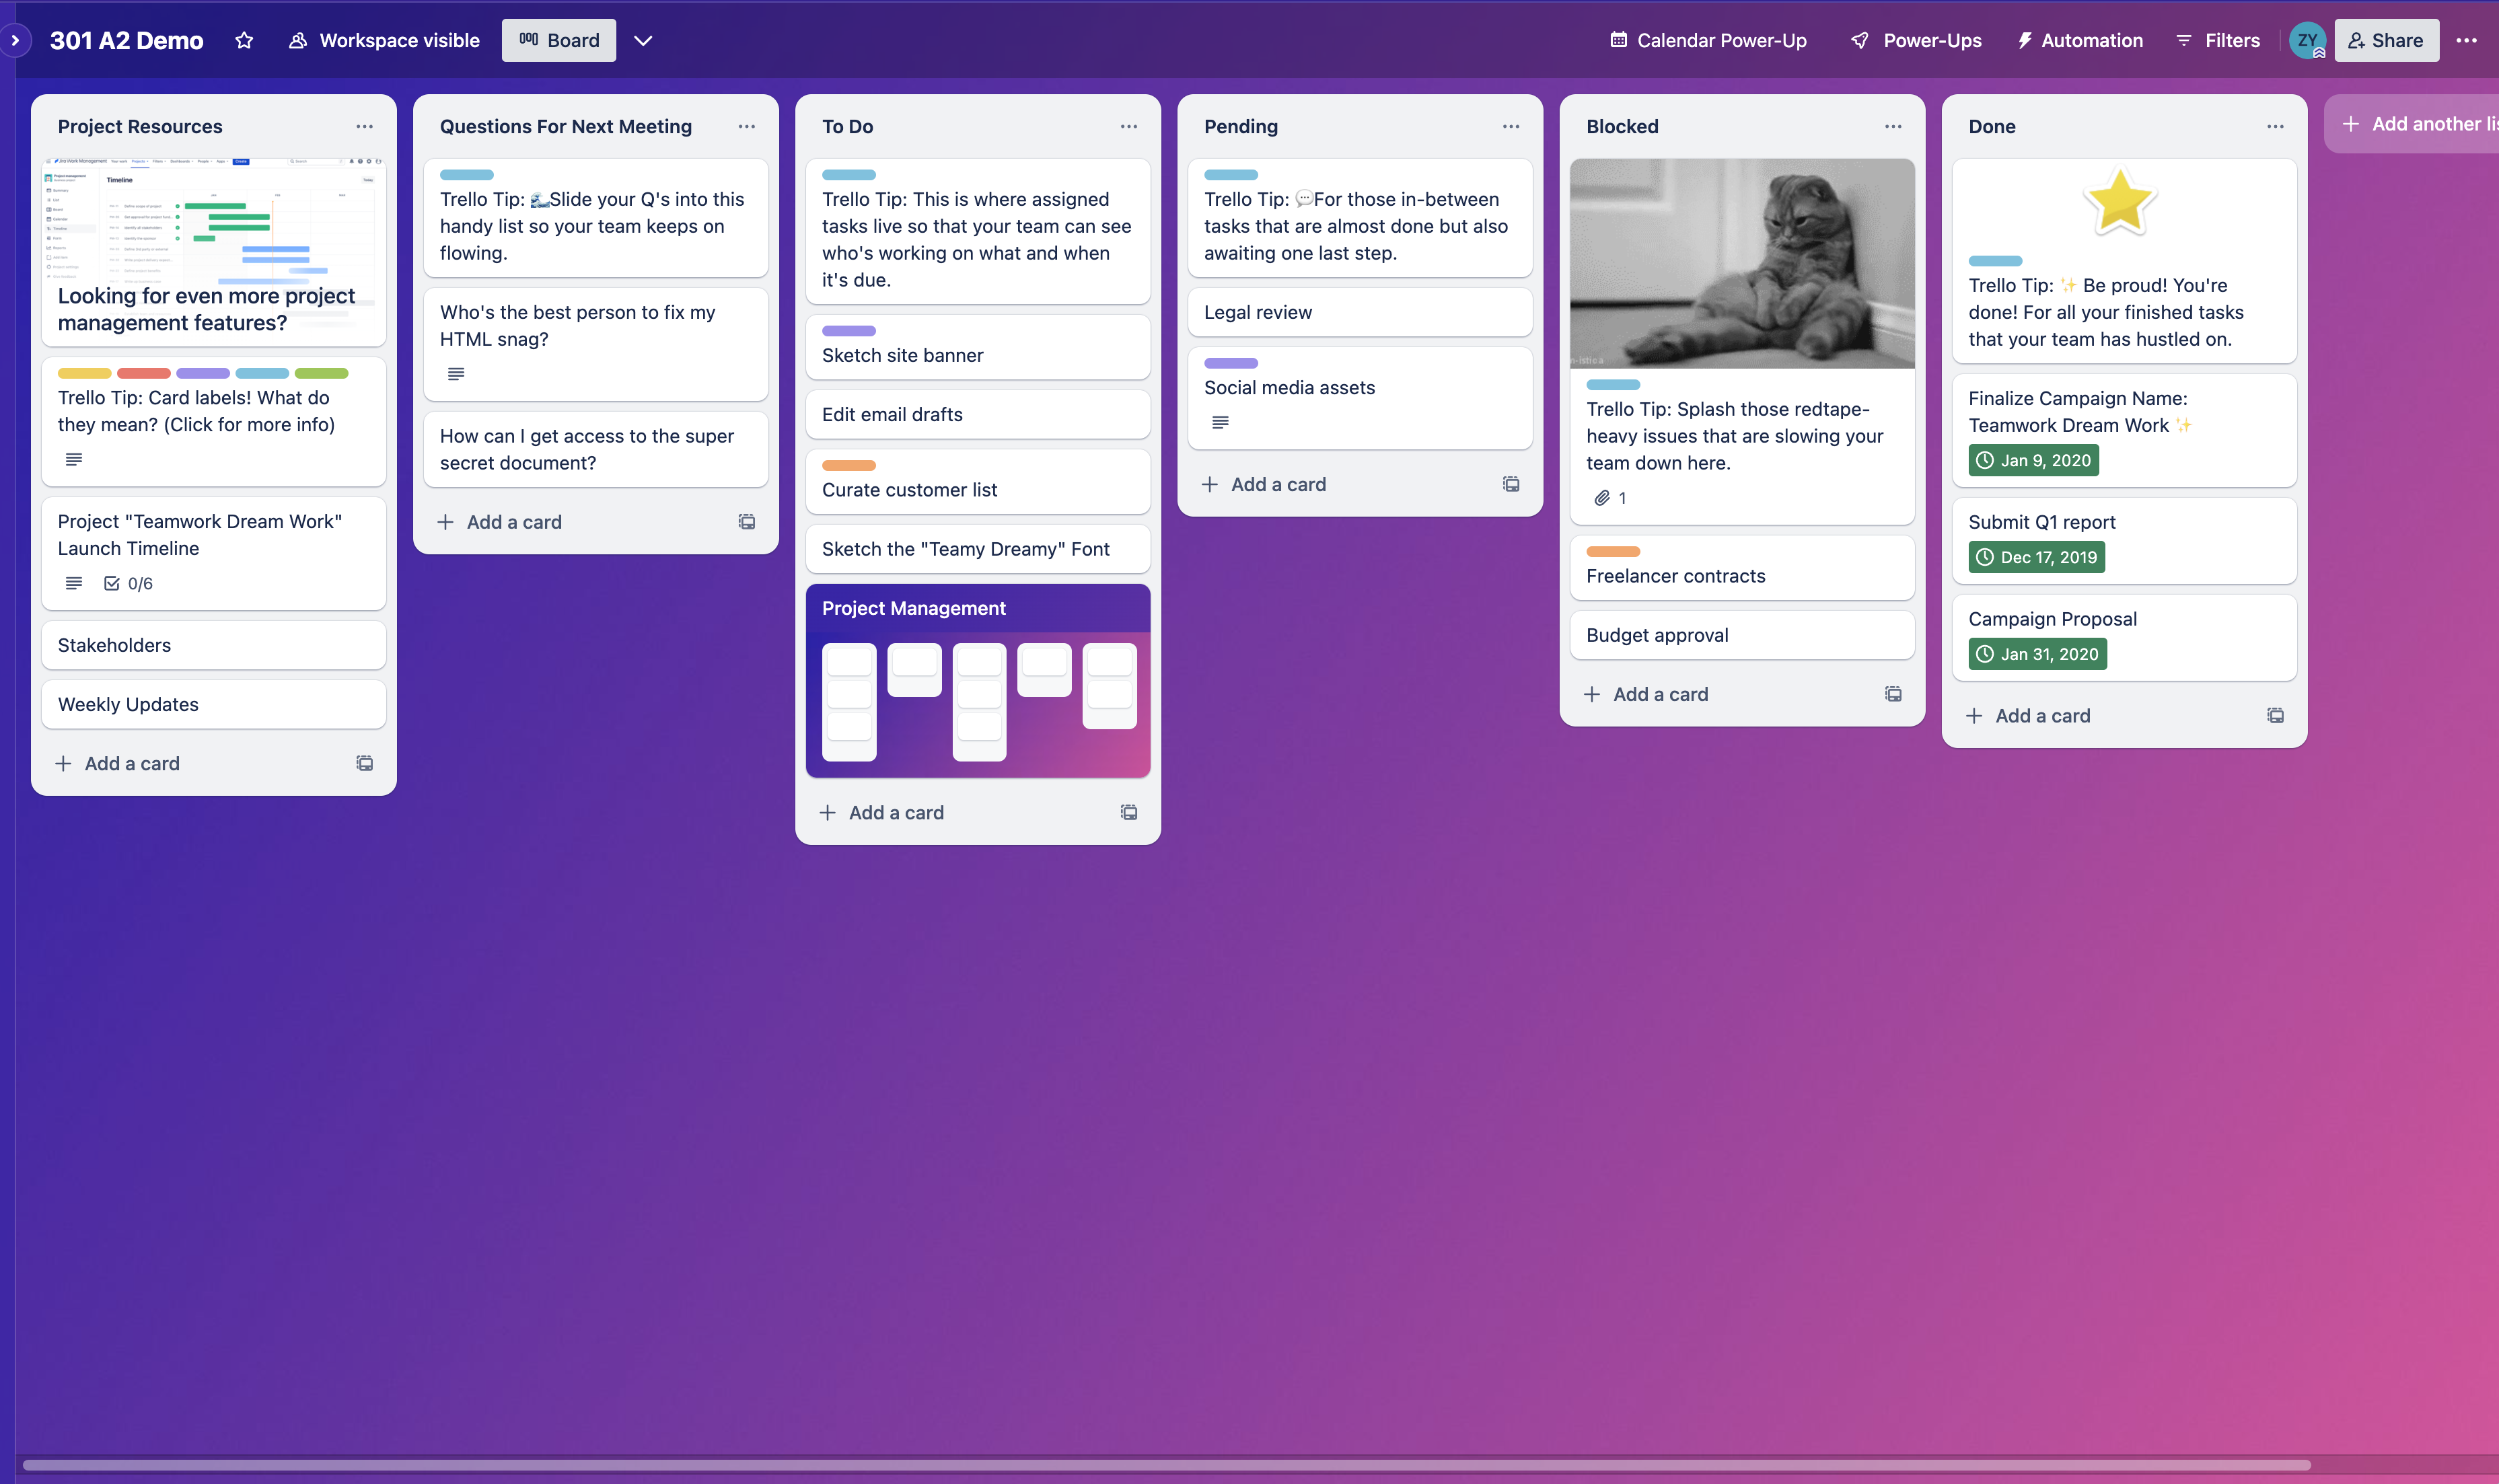
Lists represent different stages or types of tasks in your project. Typical lists for a software project might include “To Do”, “In Progress”, “Testing”, and “Done”.
1. Creating Lists: Click on the "Add a list" option on your board. Name the list according to the phase of the task it represents and click "Save".
2. Organizing Lists: You can click and drag lists to rearrange them on your board. Arrange them in a logical order that reflects your workflow.
Utilizing Cards
Cards are the individual tasks or items that need to be completed. They can be added to lists and moved between them as they progress through different stages of your project.
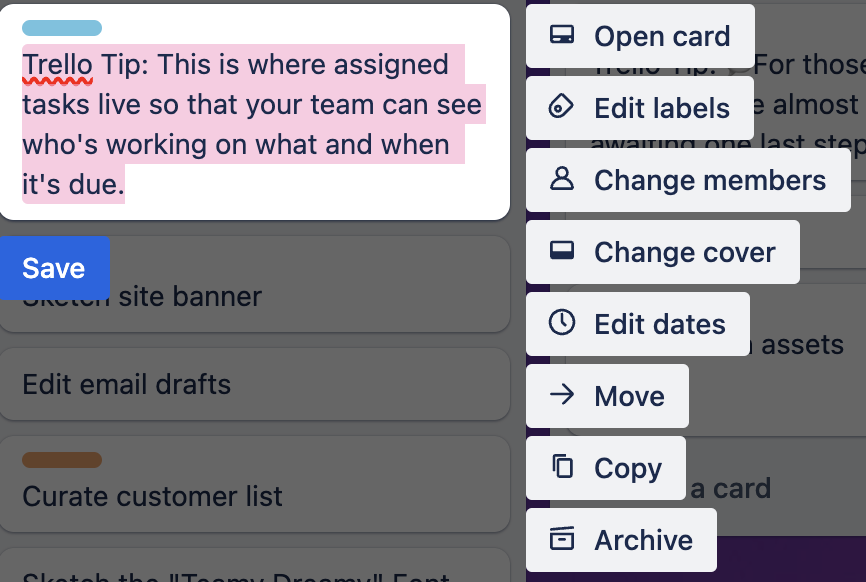
1. Adding Cards: To add a new card, click on "Add a card" at the bottom of any list. Enter a concise title for the task and click "Enter". You can open the card to add more details, such as descriptions, checklists, due dates, attachments, and comments.
2. Moving Cards: As tasks progress from one stage to another, simply click and drag cards from one list to another. This visual movement helps track the progress of tasks through your workflow.
3. Detailed Information: Each card can hold a significant amount of information, making it a comprehensive tool for task management. You can assign cards to specific team members, add labels for easy categorization, set deadlines, and more.
Tips for Effective Board Management
- Regular Updates: Keep your board up-to-date by regularly reviewing and adjusting cards and lists. This ensures that the board accurately reflects the current status of your project.
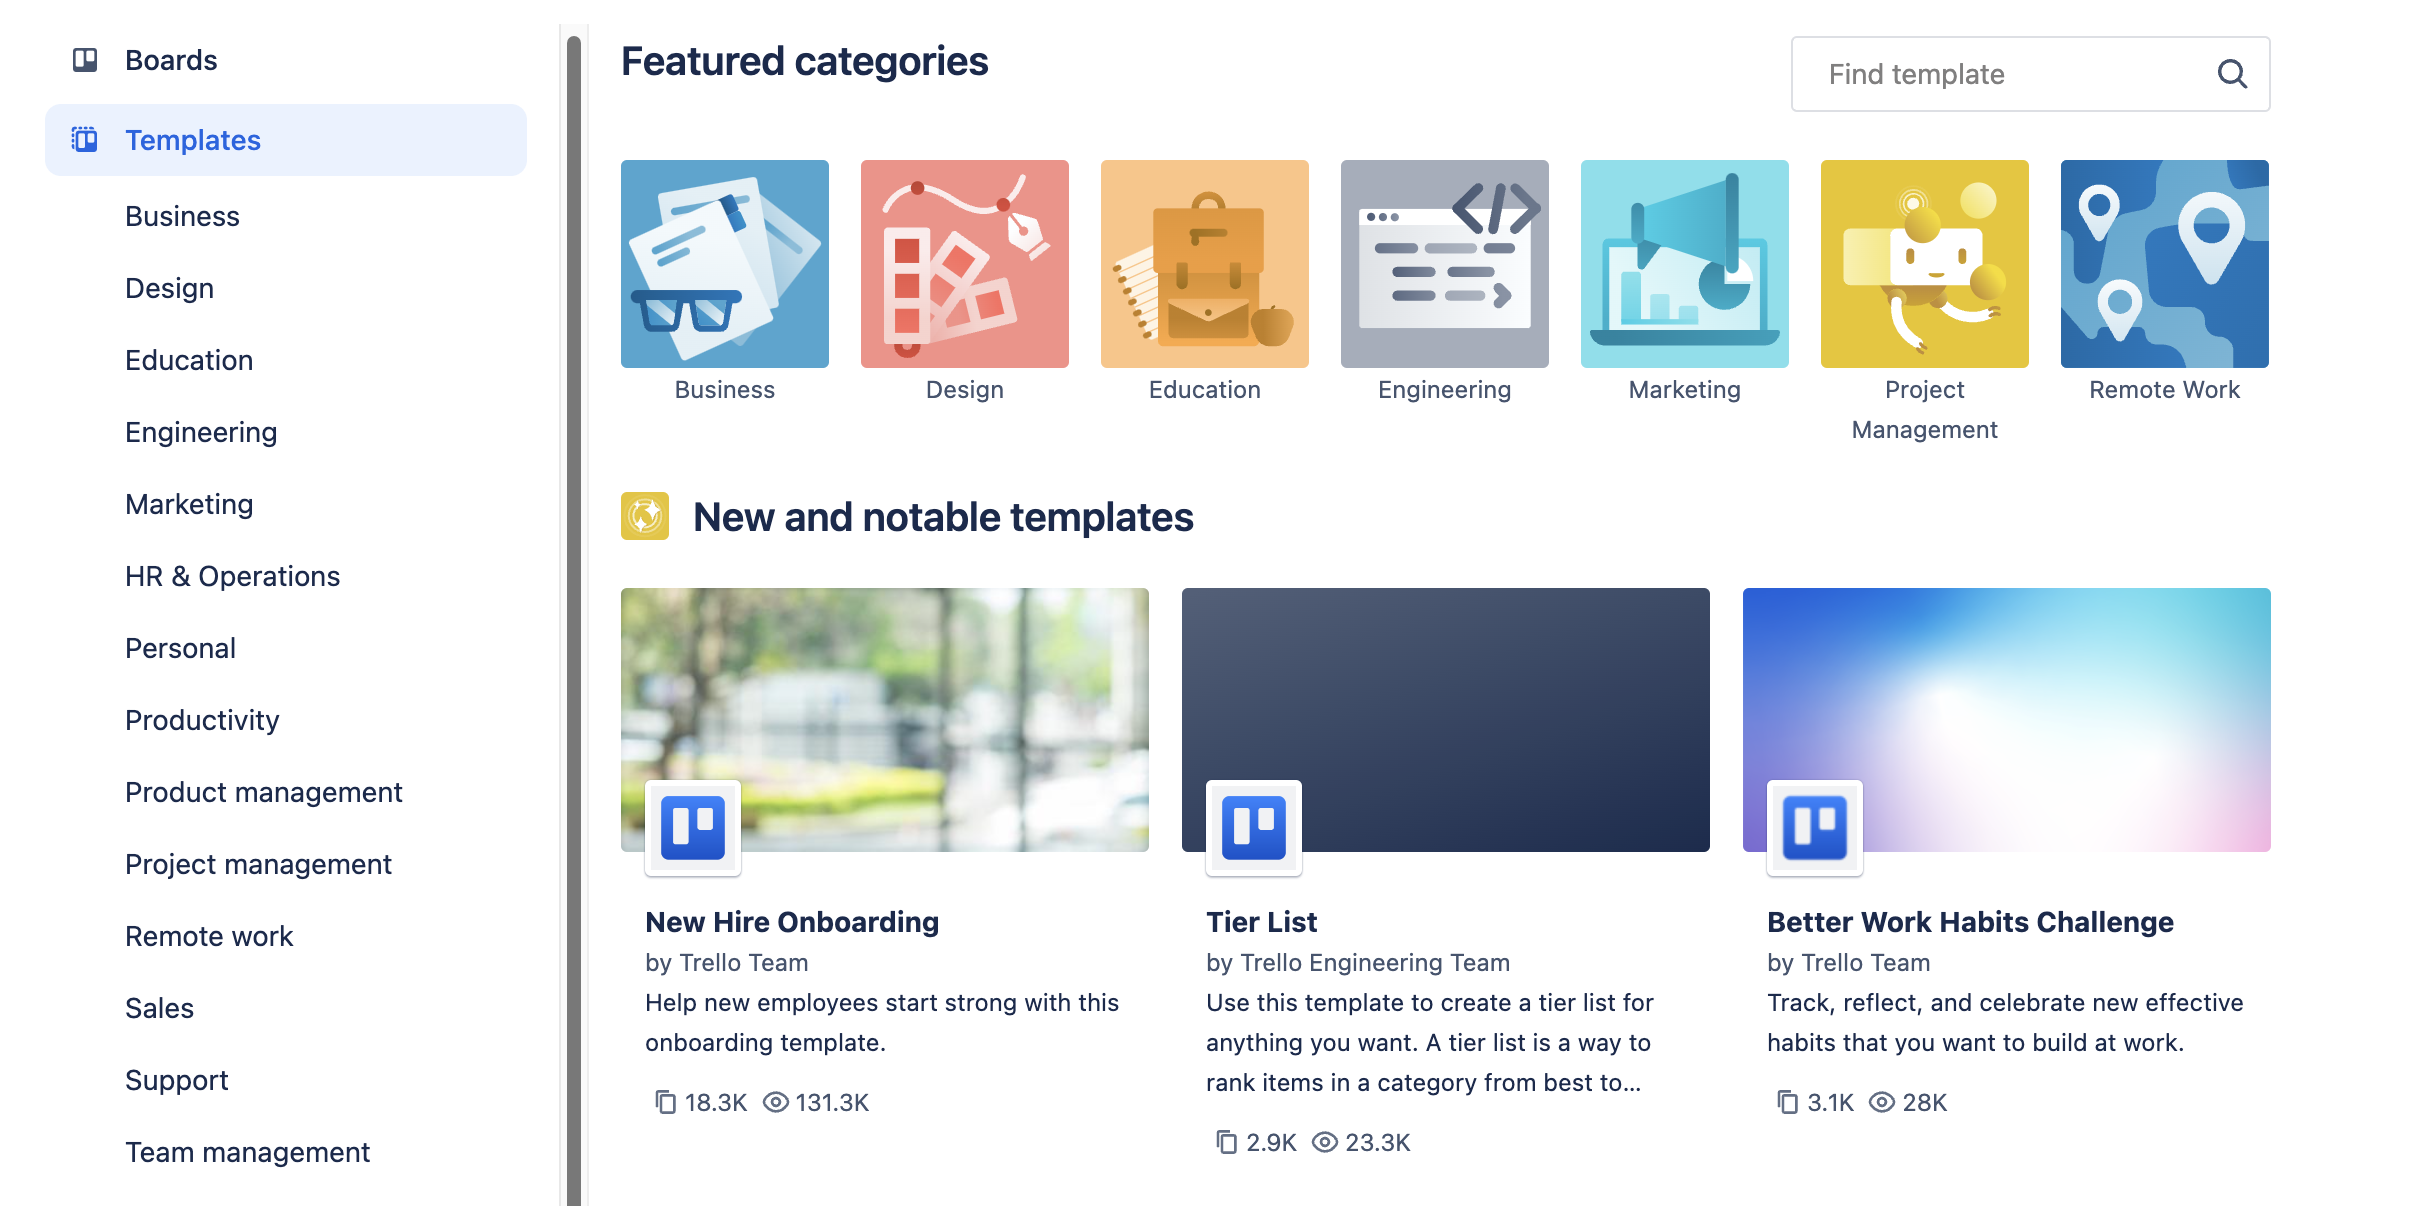
- Board Templates: Trello offers a variety of templates for different projects and purposes. Exploring these templates can provide inspiration and possibly a jumpstart in setting up your board.
Best Practices for Managing Tasks
Effective task management is crucial for the smooth operation and success of any project. In this section, we explore best practices for managing tasks within Trello, focusing on categorization, assignment, prioritization, and deadline setting to optimize project workflow and team productivity.
Categorizing Tasks Using Lists
 Lists are a versatile feature in Trello that can be used to categorize tasks into different stages or types, providing
a clear overview of project progress. Common categorizations include:
Lists are a versatile feature in Trello that can be used to categorize tasks into different stages or types, providing
a clear overview of project progress. Common categorizations include:
- To Do: Tasks that are yet to be started.
- In Progress: Tasks that are currently being worked on.
- Review: Tasks that require review or testing.
- Done: Tasks that have been completed.
Tips:
- Customize your lists to reflect your specific project workflow. You might add lists for "Backlog," "Testing," or "Awaiting Feedback" depending on your project's needs.
- Use the board's flexibility to adapt to project changes. Lists can be added, removed, or renamed as your project evolves.
Assigning Tasks to Team Members
Proper task assignment ensures that every team member knows their responsibilities, leading to efficient task completion.
Tips:
- To assign a task, add members to a card. Click on the card, then select "Members" and add the appropriate team members.
- Communicate task expectations and deadlines clearly when assigning tasks. Use the card's description and comment features to provide detailed instructions and expectations.
Using Labels for Task Prioritization and Categorization
Labels provide a visual cue for task prioritization and categorization, making it easier to sort and identify tasks at a glance.
Tips:
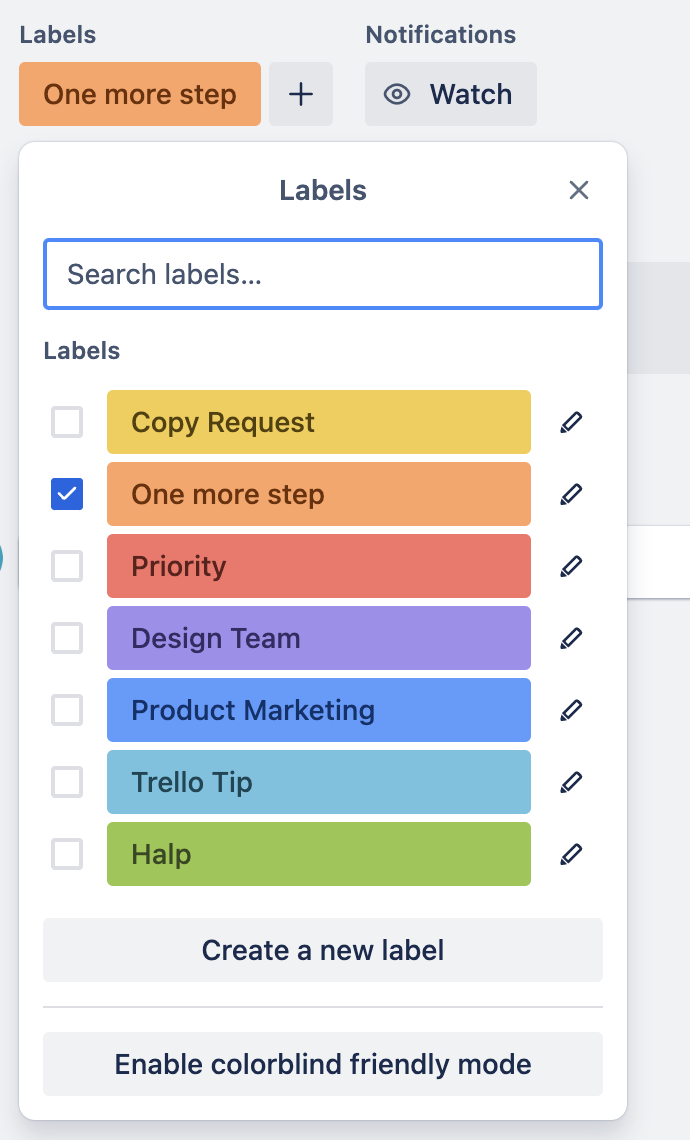
- Create a color-coded labeling system. For example, use red for high priority, yellow for medium, and green for low.
- Labels can also categorize tasks by type (e.g., "Bug," "Feature," "Improvement") or by team (e.g., "Frontend," "Backend," "UI/UX").
- To add a label, open a card and select "Labels." You can choose from existing labels or create new ones.
Setting Deadlines and Using the Calendar Feature
Deadlines are critical for maintaining project momentum. Trello’s calendar feature helps in tracking these deadlines effectively.
Tips:
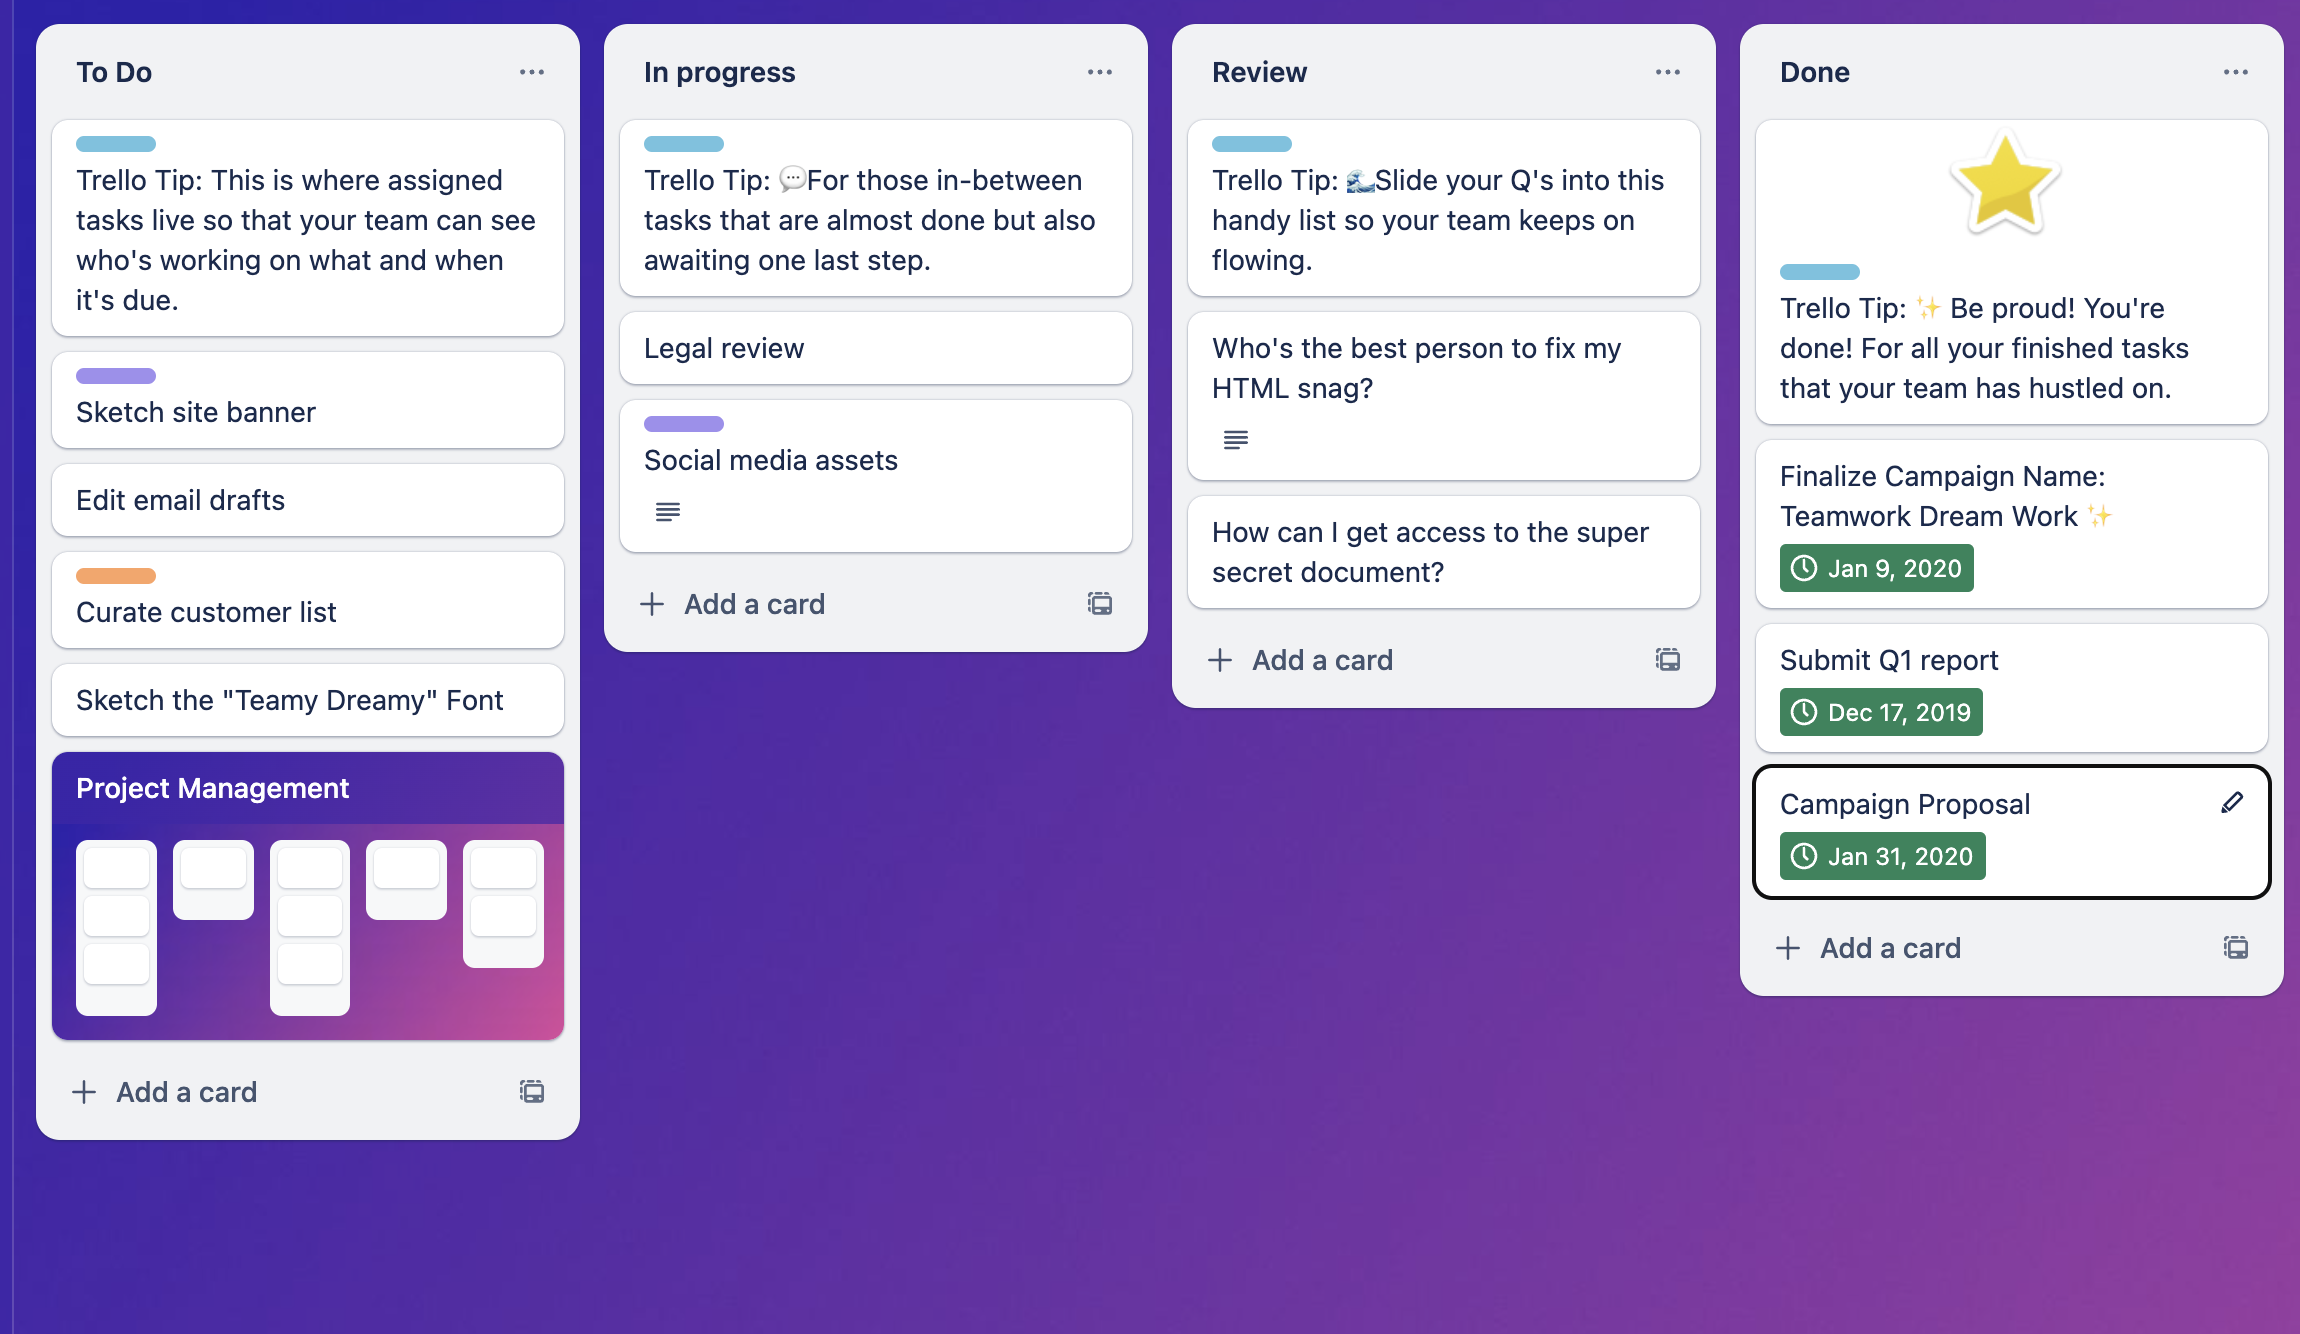
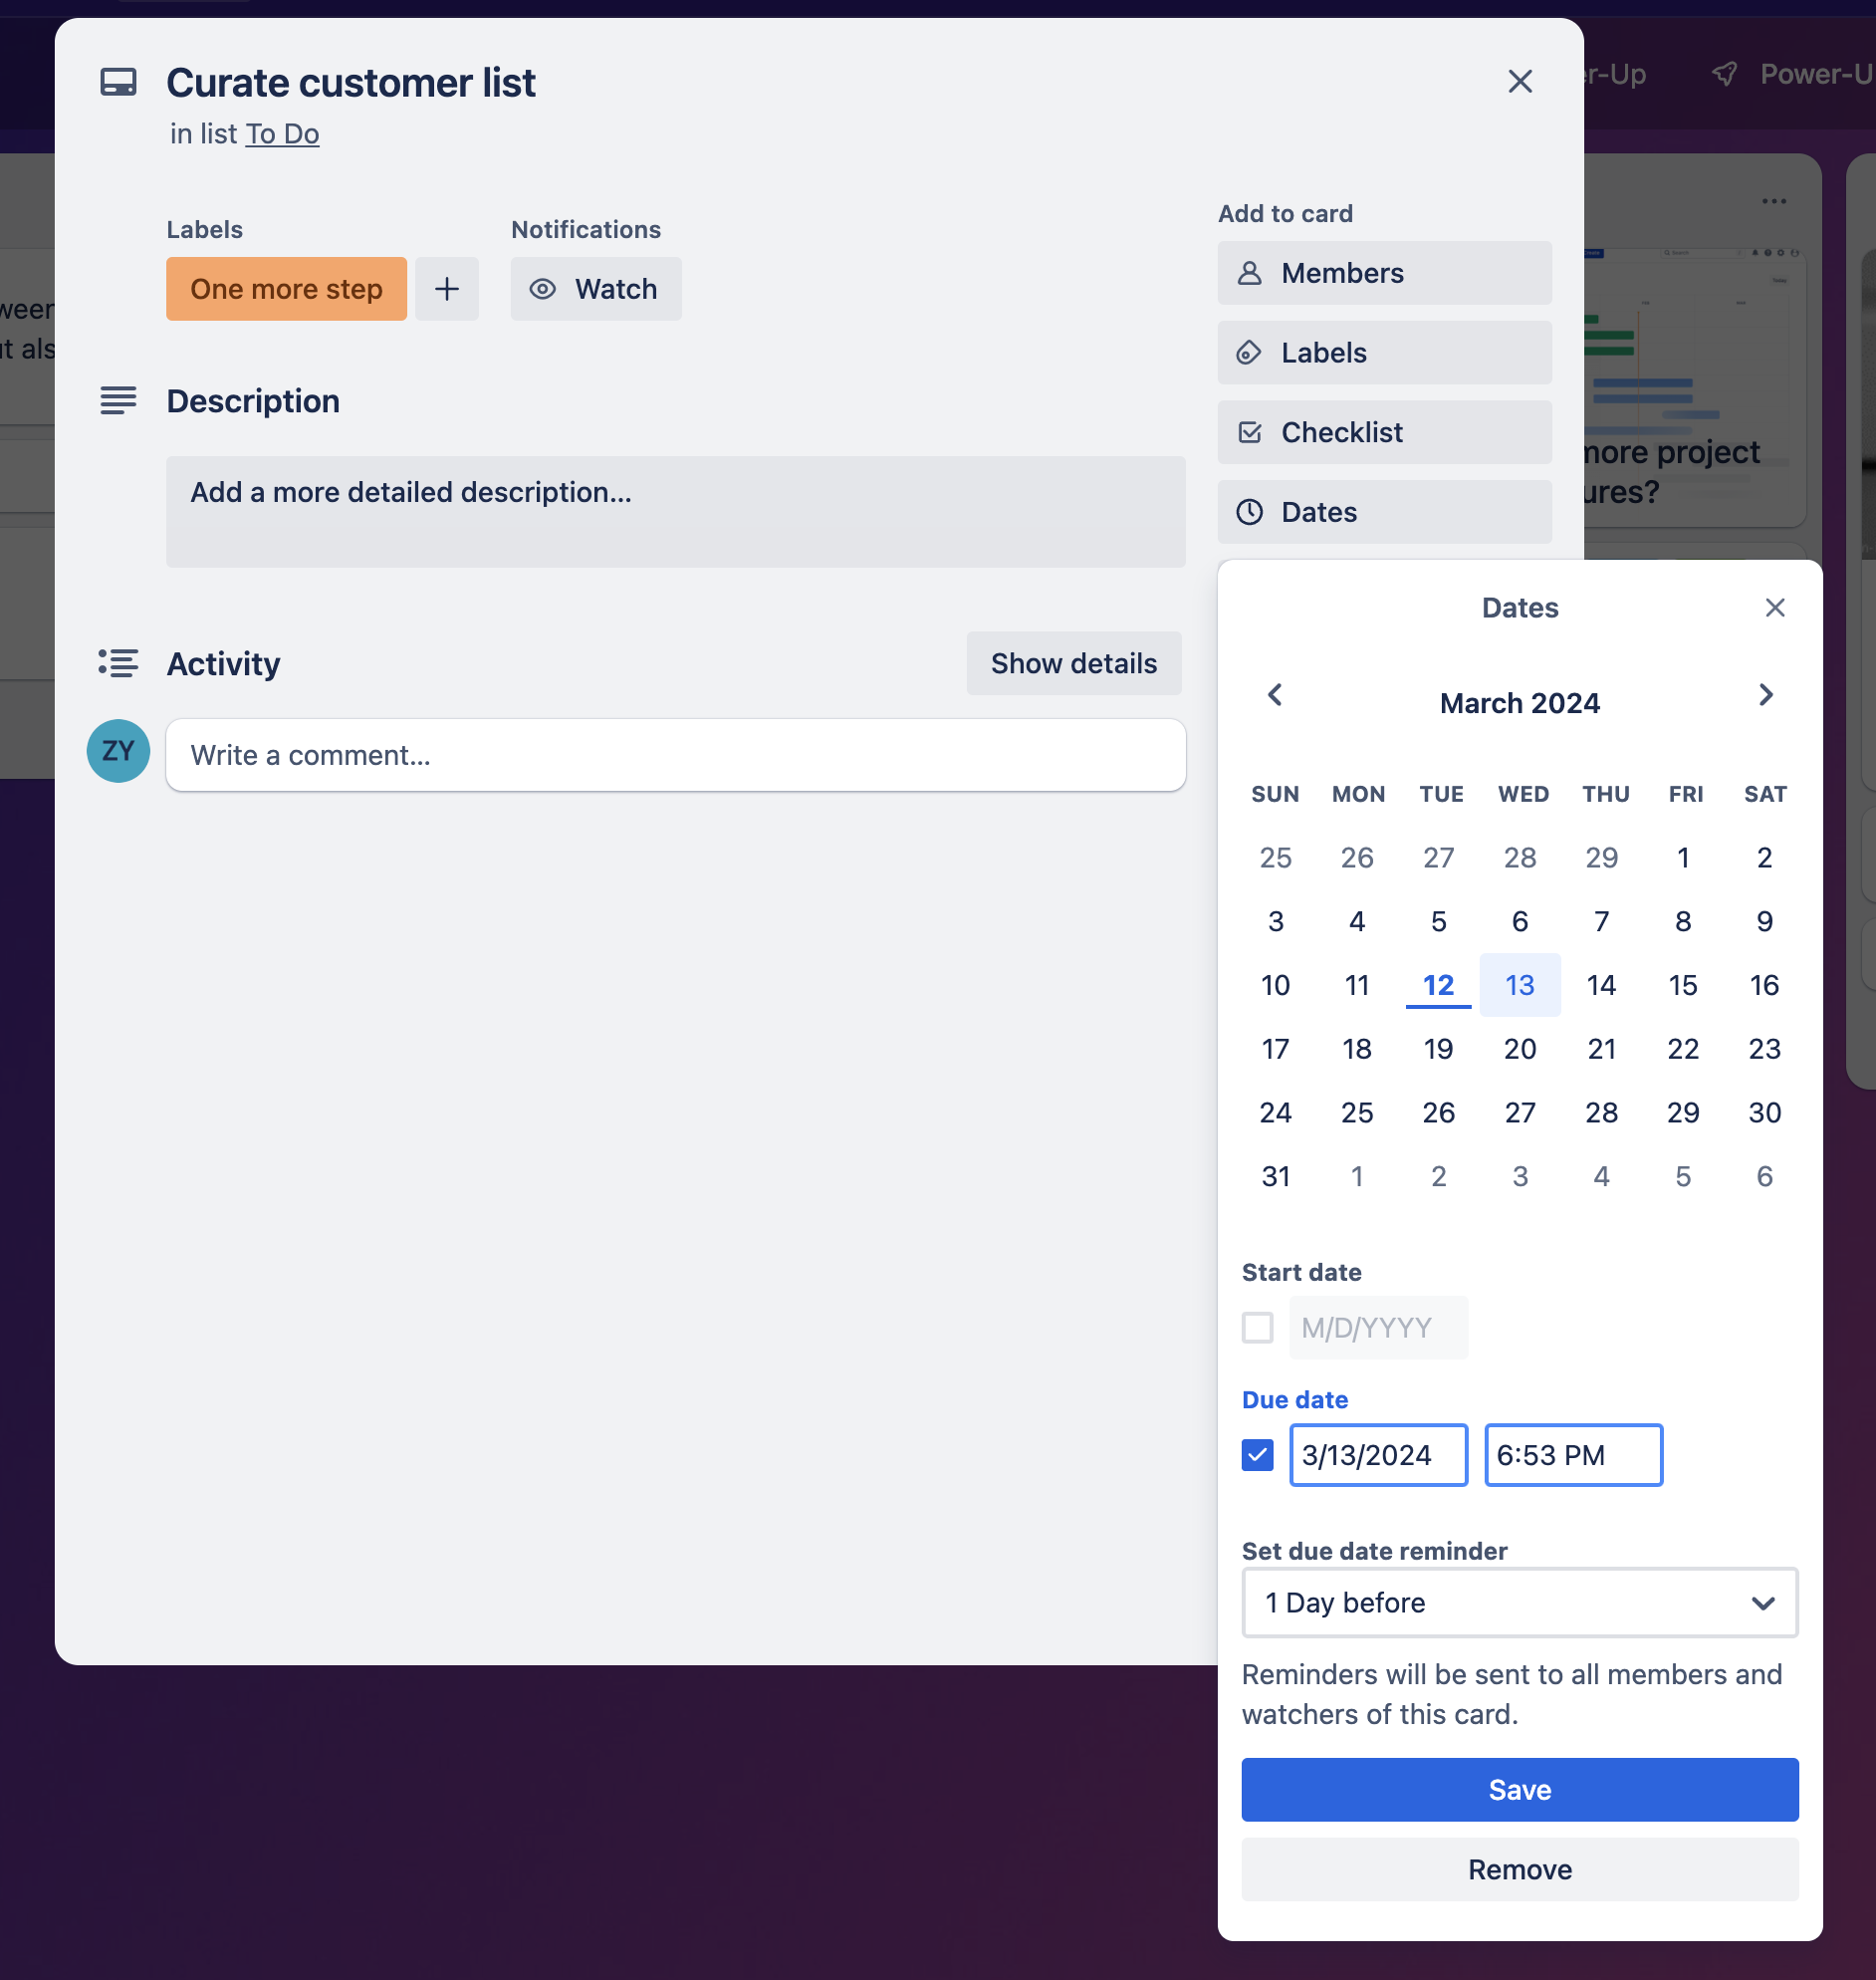
- Set due dates on cards to establish clear deadlines. Open a card, select "Due Date," and choose the appropriate date and time.
- Enable the Calendar Power-Up on your board to view all your tasks with due dates in a calendar format, offering a monthly or weekly overview of project deadlines.
- Use the calendar to identify potential bottlenecks or conflicts in your schedule, allowing you to adjust task assignments and deadlines accordingly.
Enhancing Collaboration with Trello
Collaboration is the cornerstone of any successful project, and Trello provides a suite of tools designed to foster effective team integration and communication. This section delves into how you can use Trello to enhance collaboration among team members, ensuring everyone is aligned and can contribute efficiently to the project’s success.
Team Integration
Adding team members to your Trello board is the first step in fostering a collaborative environment. Here’s how you can do it:
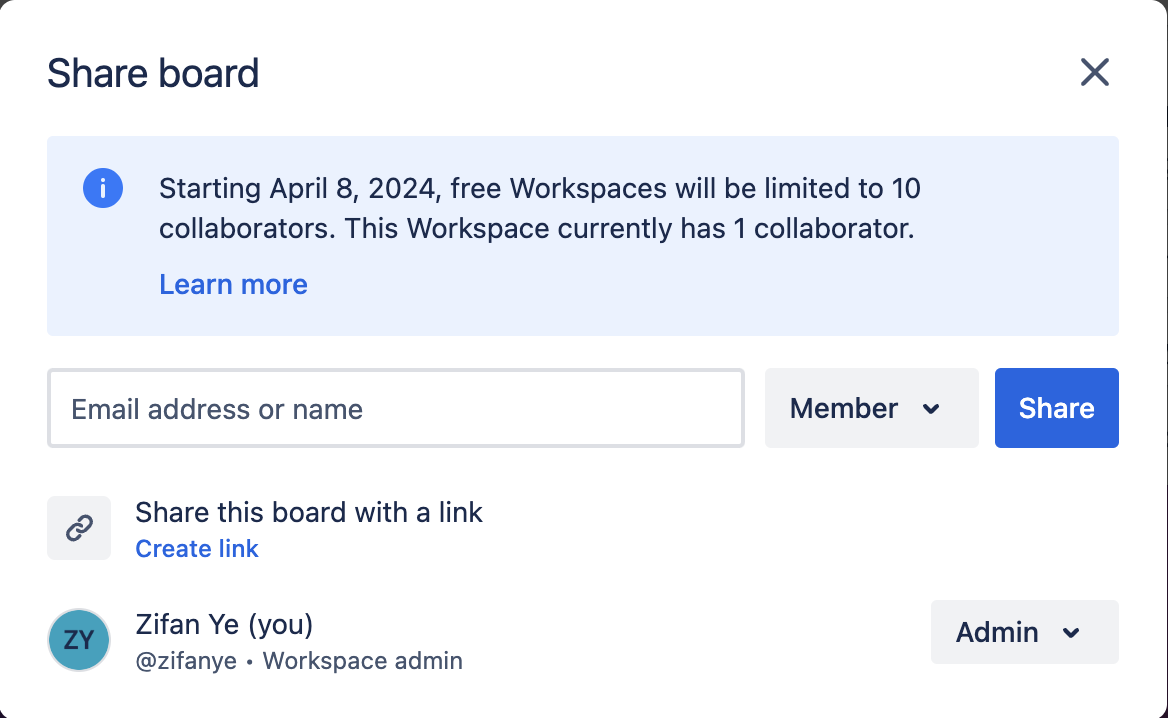
1. Adding Members to a Board: On your board, click the "Invite" button or look for the "Add Members" option. You can invite members by entering their email addresses or Trello usernames. Once invited, members will have access to the board and can view, edit, or add cards, depending on the permissions you set.
2. Setting Permissions: It's important to set appropriate permissions for board members. Trello allows you to specify whether members can add/edit cards, invite other members, or have administrative rights on the board. Tailor these permissions to fit your team's needs and project requirements.
3. Promoting Active Collaboration: Encourage team members to actively participate by assigning them tasks, asking for updates in card comments, and scheduling regular check-ins using the board as a reference point. This keeps everyone engaged and ensures that tasks are progressing as planned.
Communication Tools
Clear communication is essential for collaboration. Trello’s features such as comments, attachments, and checklists can significantly enhance the way your team communicates.
1. Comments: Use the comment section on each card to discuss task details, provide updates, or ask questions. Tagging members in comments (using "@username") ensures they receive notifications, drawing their attention to important messages.
2. Attachments: Attach files directly to cards to keep all relevant information in one place. Whether it's design mockups, documents, or spreadsheets, attachments make it easy for team members to access and review project materials.
3. Checklists: Break down tasks into smaller, actionable items using checklists. This not only clarifies what needs to be done but also allows team members to mark off completed items, providing a clear visual progress indicator.
4. Integration with Other Tools: Trello integrates with various third-party tools like Slack, Google Drive, and GitHub. Leveraging these integrations can streamline workflows and centralize communications, making it easier for your team to stay connected and informed across different platforms.
Integrating Trello with Other Tools
Trello’s flexibility extends to its ability to integrate with a wide range of software development tools, enhancing your project management capabilities. This integration streamlines workflows and brings essential functionalities directly into your Trello environment.
Popular Integrations:
Integrating with Development Tools: GitHub
1. Enable the GitHub Power-Up:Navigate to your board's menu, select "Power-Ups," find the GitHub Power-Up, and click "Add".
2. Connect Your GitHub Account: Once added, you'll need to connect your GitHub account by following the prompts.
3. Usage: To attach GitHub links to a card, click on the card, select the "GitHub" option from the Power-Up section, and then choose the commits, branches, or issues you wish to link.
Integrating with Communication Platforms: Slack
1. Enable the Slack Power-Up: In your board's menu, find and add the Slack Power-Up.
2. Connect Your Slack Workspace: Follow the setup instructions to connect Trello to your Slack workspace.
3. Usage: Configure notifications and select the Slack channel where you want Trello updates to appear. You can also link cards and boards directly in Slack conversations.
Integrating with Productivity Apps: Google Drive, Dropbox, and OneDrive
1. Enable the Power-Ups: For each service (Google Drive, Dropbox, OneDrive), add the respective Power-Up through your board's menu.
2. Connect Your Accounts: After adding a Power-Up, connect your account for the service by following the prompts.
3. Usage: To attach a file to a card, open the card, select the appropriate option from the Power-Up section, and choose the file you want to attach.
Detailed Guides and Tutorials
For those new to these integrations, here are links to detailed guides and tutorials that provide step-by-step instructions:
- GitHub Integration: Trello GitHub Power-Up
- Slack Integration: Trello Slack Power-Up
- Google Drive Integration: Trello Google Drive Power-Up
Reference
- https://trello.com/teams?utm_source=trello&utm_medium=inapp&utm_content=header-tips&utm_campaign=playbooks
- https://trello.com/guide
- https://trello.com/power-ups/55a5d916446f517774210004/github
- https://trello.com/power-ups/55a5d917446f51777421000a/slack
- https://trello.com/power-ups/55a5d916446f517774210006/google-drive