Introduction to Unity’s ML-Agents Toolkit
Unity’s ML-Agents Toolkit, or simply ML Agents, is a package that provides a simple and intuitive way to develop agents capable of interacting with both 2D and 3D environments in Unity. It is a project that aims to bring machine learning together with the many environments that can be easily developed in Unity, and provide an easy and accessible way for game developers to work with machine learning. With ML-Agents, the focus is on giving game developers an opportunity to effortlessly incorporate machine learning capabilities. This toolkit opens up possibilities for training agents to navigate intricate environments and tackle challenging problems that might be impractical to solve manually through traditional algorithms.
In this introductory tutorial, we will explore the basics of reinforcement learning with an example project built completely from scratch.
Installation Guide
Before installing Unity’s ML-Agents package, ensure that you installed the following:
Before we continue with any further installations, it is recommended that you create a virtual environment to avoid any potential conflicts with existing packages. To do so, create and navigate into a folder that will later hold this entire project.
To create the virtual environment, run py -m venv environment_name, replacing environment name with the desired name of your environment. For the purposes of this tutorial, I will refer to the virtual environment as “venv”.
Finally, to access the virtual environment, run the following command in your terminal. venv\Scripts\Activate. We will install the following packages in this virtual environment through your terminal.
PyTorch
pip3 install torch~=1.13.1 -f https://download.pytorch.org/whl/torch_stable.html
ML Agents Python Package
pip3 install ./ml-agents-envs
pip3 install ./ml-agents
Finally, within Unity’s Package Manager, find and install the com.unity.ml-agents package.
What is Reinforcement Learning?
In this tutorial we will use Unity’s ML-Agents Toolkit to explore the basics of reinforcement learning. Reinforcement Learning is a form of machine learning where an agent will learn to make decisions by interacting with an environment. Based on the actions it performs, it will receive a reward that indicates how well it performed. Over time, the goal of the agent is to learn a strategy that maximizes the reward it receives. In order to do so, our agent will follow a simple cycle of 3 steps. It will first collect an observation from the environment. Using this information collected, it will perform an action. Finally, based on this action, we will give the agent a reward.
Our agent will attempt to learn a strategy that will maximize the reward it receives over time.
Setting up the Environment
In this step by step tutorial, we will learn how to create a simple environment in which we are able to train an agent to play a simple game. The basic setup I will use to introduce the concepts of reinforcement learning will involve an Agent, and two rewards of varying sizes.
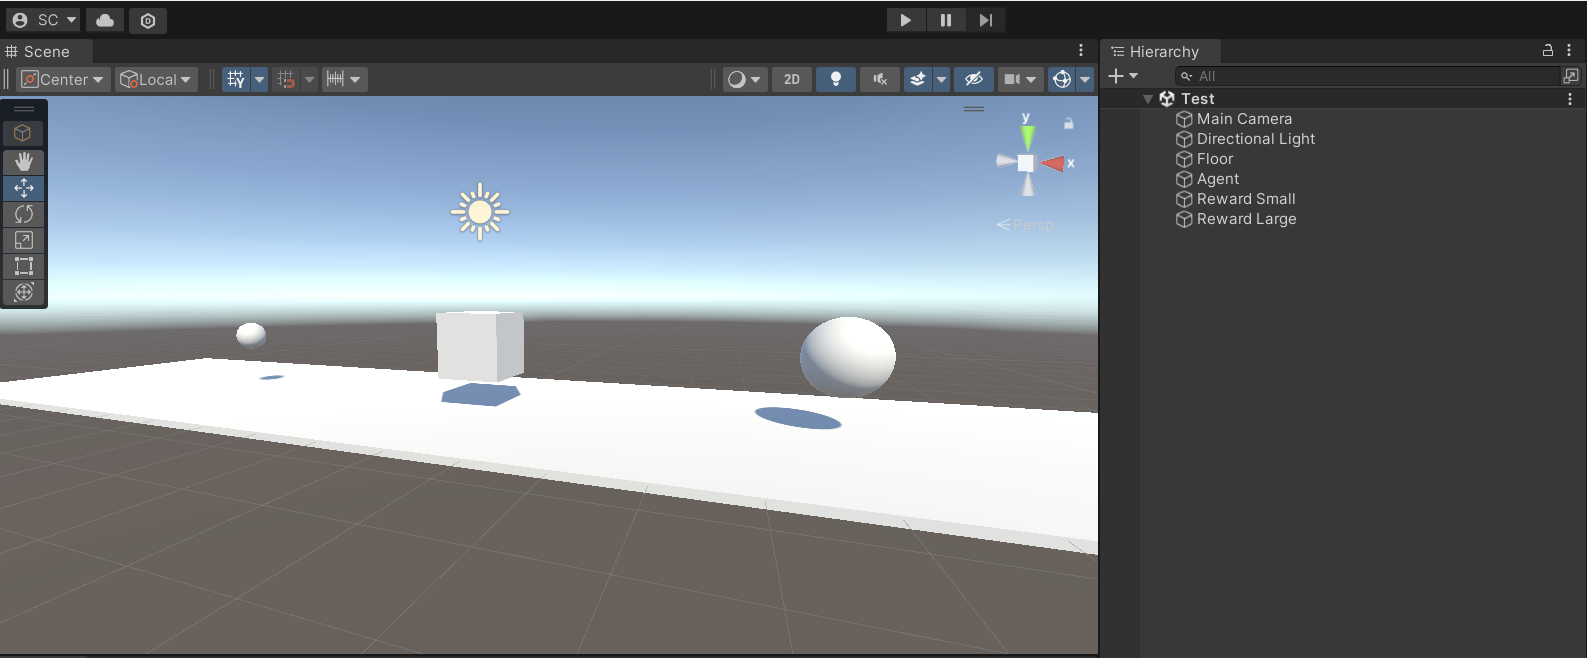
In my setup, I have currently created a floor, an Agent, and 2 rewards.
They are positioned along a straight line. Our environment will involve the agent being able to perform 3 actions, moving left, moving right, or doing nothing at all. Hopefully, we will be able to train this agent to move towards the larger value.
Finally, to finish this section, create a C# script and attach it to your agent object. I have named the script BiggerRewardAgent.cs, but feel free to change the name to anything you’d like.
Actions
Now that our environment is set up, we will assign actions that our agent is able to perform. Begin by opening the CollectRewardAgent.cs script with any text editor you would like, such as Visual Studio or Visual Studio Code. In order to create an agent, we will change monobehaviour to agent. This means that our new agent will inherit from the Agent class, rather than Monobehavior. To utilize Unity’s MLAgents Toolkit, we will import the following:
using UnityEngine;
using Unity.MLAgents;
using Unity.MLAgents.Sensors;
using Unity.MLAgents.Actuators;
We will also be removing the Update() and Start() functions, and adding the following overrides. These are the functions that control the behaviour of our agent.
public override void OnEpisodeBegin()
public override void CollectObservations(VectorSensor sensor)
public override void OnActionReceived(ActionBuffers actions)
public void OnTriggerEnter(Collider other)
In the following few sections, we will go through and explain how to implement each of these functions in detail. We will first begin with OnActionReceieved()
Unlike us, our agent is only able to play through making actions through numbers. These numbers will be given through the ActionBuffer. As specified before, we want our agent to be able to move left, right, and stand still. We will accomplish this by assigning each action a number. We begin by obtaining the action from DiscreteActions, or integer actions. We will set up where our AI gets these DiscreteActions later in our observations section.
This function allows our agent to perform actions based on a value it receieves from a ActionBuffer. You could think of the ActionBuffer as a signal, like a traffic light. Depending on the signal receieved, we must implement what our agent ultimately ends up doing, such as stopping if we receieve a red light.
public override void OnActionReceived(ActionBuffers actions)
    {
        int action = actions.DiscreteActions[0];
        switch (action)
        {
            case 0:
                transform.Translate(Vector3.left * Time.deltaTime);
                break;
            case 1:
                transform.Translate(Vector3.right * Time.deltaTime);
                break;
            case 2:
                break;
        }
    }
In our case, our signal is an integer value from 0 to 2. When receiving a 0, our agent will move left. When receiving a 1, our agent moves right, and when receiving a 2, our agent does nothing. While it might make sense for us to assign case 0 to moving left, and either case 1 or 2 to moving right, the agent does not have any context to what each number means. This means that any number can be assigned to any action, and they will all be treated equally by our agent.
Now that our agent is capable of making moves, we will now make it able to make observations.
Observations
In order for our agent to learn from its environment, it must be able to gather information from its environment. As our agent only needs to solve a very simple problem, we will give it some very simple information. To solve this problem, it should be able to observe its own position, and the position of both rewards.
To make things easier, we should add a reference to both rewards at the start of our agent class
public class CollectRewardAgent : Agent
{
    public GameObject rewardSmall;
    public GameObject rewardLarge;
    ...
This will allow us to easily access the position of both reward objects as well. To add an observation, we simply go under the CollectObservations function and call sensor.AddObservation(). We would like to add the x value of all 3 positions, as our agent will only be capable of moving along the x axis.
public override void CollectObservations(VectorSensor sensor)
    {
        sensor.AddObservation(rewardSmall.transform.localPosition.x);
        sensor.AddObservation(rewardLarge.transform.localPosition.x);
        sensor.AddObservation(transform.localPosition.x);
    }
Here we are adding the local positions of all 3 objects. We use localPositioning here so that our agent will be able to learn properly regardless of where it is located in your Unity environment.
Our agent is now able to observe the world around it, as well as make movements left or right. The only thing left to do is to assign a reward function to tell our agent how well it is currently doing.
Rewards
Now to assign a reward, this process will differ depending on what you want to train your agent to do. For our scenario, it is sufficient to give the agent a reward when it touches a reward. We will accomplish this with Unity’s OnTriggerEnter() function.
public void OnTriggerEnter(Collider other)
    {
        if (other.gameObject == rewardSmall)
        {
            SetReward(1f);
        }
        if (other.gameObject == rewardLarge)
        {
            SetReward(10f);
        }
        EndEpisode();
    }
From anywhere in Unity, we are able to assign rewards to our agent using the functions SetReward() and AddReward(). For our purposes, we will set a reward when the agent collides with another object, in this case, either the small or large reward. While the amount you assign to each reward is arbitrary, they should be similar relative to each other. If the rewards are too close to each other, the agent might not learn effectively. Play with your values to find an optimal value.
Something you might have noticed is the EndEpisode() after we assign the reward. In Unity’s ML Agents, agents train in cycles known as episodes. When an episode ends, the agent takes its assigned reward value and attempts to learn by adjusting its behaviour, so that it can perform better in the future. However, upon ending an episode, we also need to begin a new one. We will accomplish this through the OnEpisodeBegin() function.
public override void OnEpisodeBegin()
    {
        transform.position = new Vector3(0, 1, 0);

        int rand = Random.Range(0, 2);
        if (rand == 0)
        {
            rewardSmall.transform.position = new Vector3(5, 1, 0);
            rewardLarge.transform.position = new Vector3(-5, 1, 0);
        }
        else
        {
            rewardSmall.transform.position = new Vector3(-5, 1, 0);
            rewardLarge.transform.position = new Vector3(5, 1, 0);
        }
    }
After each iteration, we want to reset our training environment. We can accomplish this by resetting the positions of each object when our training episode begins. This simply resets the position of my agent back to its starting location, and randomly assigns the rewards to place either the smaller or larger reward on either side.
Training
And with that, our setup is almost ready for training. Head to the inspector of our Agent. Observe the behavior parameters. There are 2 values that we should change. You could also give the behavior a name to help you identify it down the line.
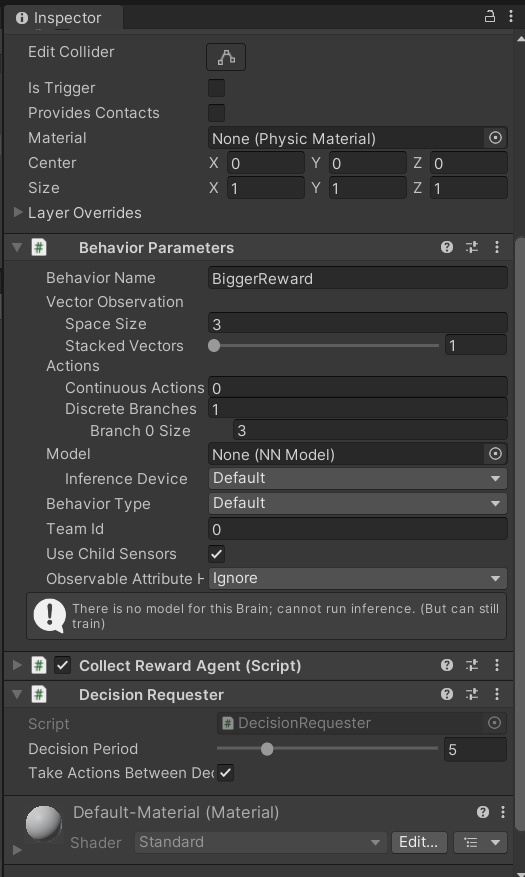
Our Vector Observation should determine the amount of observations our agent is able to make. This should match the amount of observations we gave it in our prior example, which is 3. If your training set up differs, make sure to assign the number of observations correctly.
Next, under the Actions section, we want to set the number of Discrete Branches to 1. This is where we are making our observations. Next, we want to set the size of our branch to 3. This should correspond to the number of possible actions our agent is able to make. As our agent is only able to move left, right, and stay still, the size of our action space is 3, as we assigned in the Actions section above.
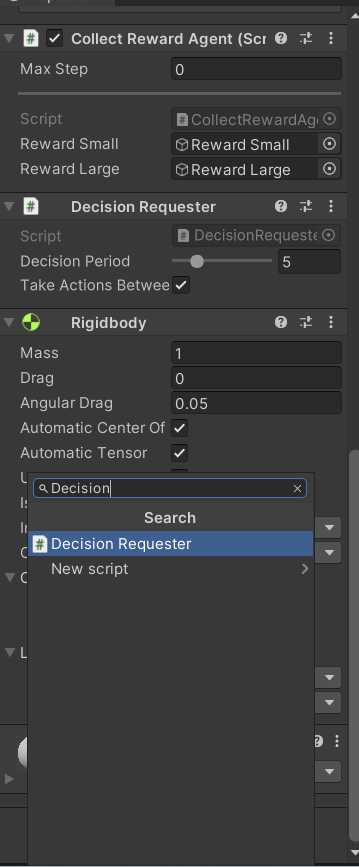
The final step is to add a Decision Requester. We have implemented actions our agent is able to take, and ways for the agent to be able to observe the environment. The final piece to tie it all together is the decision requester. This component steps in and acts as the bridge connecting its observations in the environment with the strategic decisions it wants to make. It is essentially the brain that makes choices based on what it has learned.
With that, we can begin training our agent. We can do so by opening a terminal and activating our virtual environment where we previously installed ML-Agents. To begin training, we will run
mlagents-learn --run-id="YOUR RUN ID HERE"
Replacing with your own run ID. This ID could be anything that helps you identify a session of training.
For additional parameters, run mlagents-learn --help to view them all.
Annnnnnnnd voila!
.gif?raw=true)
You’ve just learned how to train your first agent in Unity! While the agent might not appear very smart at first, it should eventually learn that moving towards the larger reward is much more rewarding than the smaller one. Over time, you should expect to see the average reward, provided every few minutes in the terminal, to increase.
To make your training environment fun and unique, you could expand on this simple setup to create a more advanced one. Fun additions you could try to build off of this example can include:
- Movement along a 2d square instead of a line
- Rewards placed at different distances away from the agent
- A penalty for taking a long time to reach a reward
- Additional obstacles your agent must avoid
For further learning and exploration, you could check out Unity’s official documentation and the ML-Agents Repo.