Access to Salesforce API
This guide will tell you how to use Salesforce API from an external website or service. The first method is suitable when you only need to make API calls, the second method is suitable if you also want to use Salesforce as a identity/authentication provider for your website, which might require a bit further customization.
Setup authentication documentation
Getting authentication token
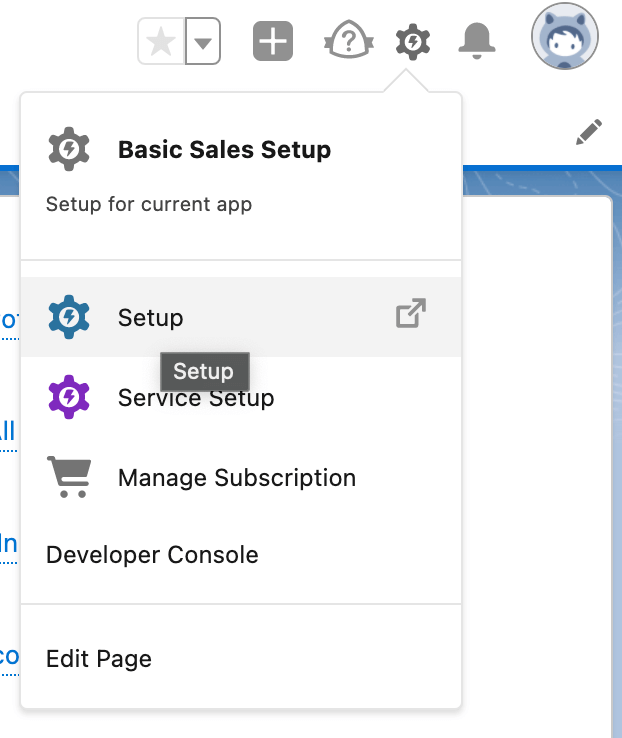
After logging into salesforce, at the top right corner, go to:
- setup > apps > app manager
- look for the name of the app you want to connect with
- click on the arrow down > view
- under ‘API (Enable Oath settings), click on ‘manage consumer details’ to get the consumer key and consumer secret


Salesforce Objects and fields
Note: In the database language, salesforce objects refer to tables/entity sets and fields refer to the attributes of the table/entity set.
After logging into salesforce, at the top right corner, go to:
- setup > object manager
There will be a list of objects and their respective API name (name of the entity set) - click on an object > “Fields & Relationships” tab to get its fields
Querying data from Salesforce
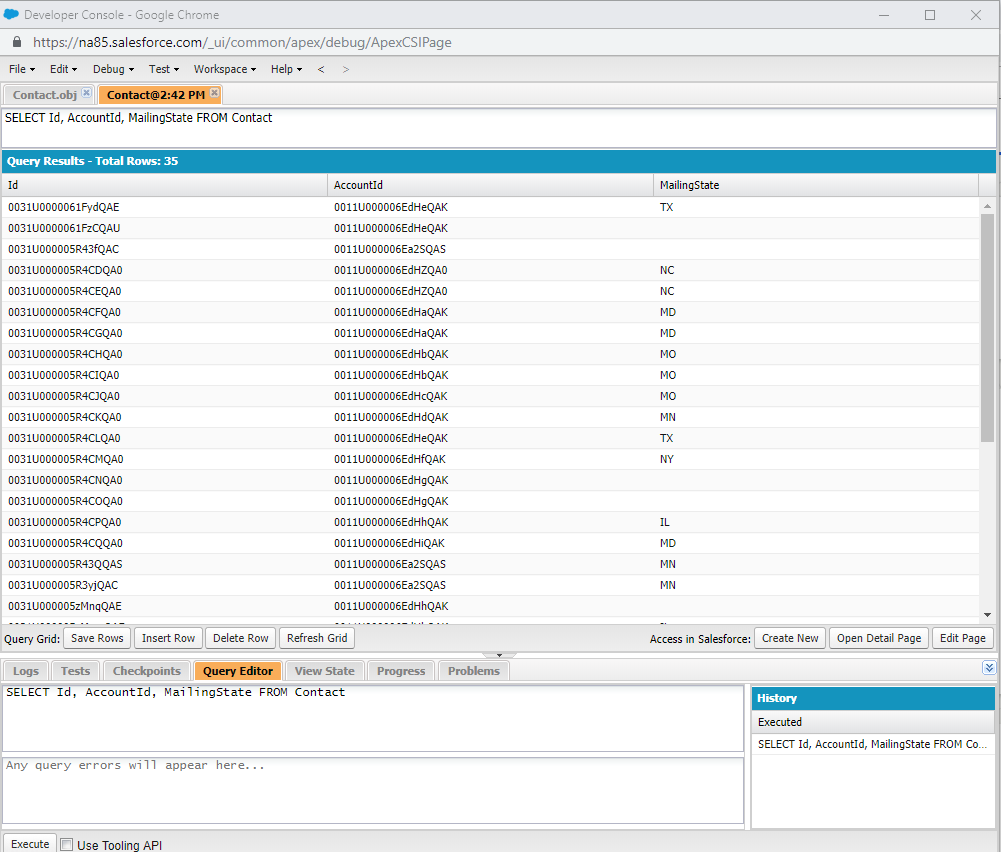
After logging into salesforce, at the top right corner, go to Developer console to test queries in the query editor.
The query editor uses SOQL - Salesforce Object Query Language

Setting up a Connected App in Salesforce to enable social login
- A Connected App is just refers to an application that uses OAuth for authentication and authorization. Refer to this link for more details about the Oauth flow:
Why would you want to use Salesforce as an authentication provider?
- If the partner organization is already partnered with Salesforce and they request a web application, it makes sense to try integrating with Salesforce directly and save the cost of hosting another expensive database.
- Users might have an easier time logging in if they already have a Salesforce account, thus making it easier for users to start using your application.
- Social log in with Salesforce connected app can be more powerful to access Salesforce API than having a username and password flow that is injected into the app because you can control the scope, and some Salesforce APIs like Chatter API use context such as the current authenticated user for important requests such as GET notifications.
Set up
- There are many different libraries and frameworks you can use for social logins. For Django there is all-auth, for example. This guide will assume you have already chosen a framework/library and have set it up correctly on your side.
- After logging into Salesforce, in the top right corner, click on the gear icon and go to the SetUp page.
- Search “App” on the left hand searchbar in the Setup menu, and go to App Manager.
- Click on “New Connected App”.
- Put in your details like Connected App Name, Email, etc.
- Enable Oauth Settings
- Provide your callback URI. The callback URI is the link Salesforce will redirect users to after users have successfully logged in. It needs to be HTTPS secure.
- Provide your scopes. Full Access is recommended for initial developmental purposes, but should be restricted down to only the necessary scopes in the future. (api), (openid), and (refresh_token) are the minimal scopes you may want.
- The OAuth settings are very customisable. This guide recommends disabling PKCE if you are in a time crunch as it adds another layer of complexity to the social login.
- Select configure ID token. In the ID Token Audiences, put in the domain of where your deployed app is hosted.
- Below are examples of what a basic conencted app might look like:
After creating the Connected App, navigate to your app in Manage Connected Apps like shown before. You will see an option to get Consumer Key and Secret, which you can inject into your project. Now users can log into your application with their Salesforce credentials, and you can also use API calls to Salesforce by sending the access token you receive from Salesforce after successful user login in the header of the API request.
Image References:
- https://blog.coupler.io/wp-content/uploads/2022/02/1-salesforce-api-setup.png
- https://lh4.googleusercontent.com/qs95ISk2oMgxsg2jRGc34XGL7XlCigtrhLlKQHFiFnbHs-R87LPZn7zWPTDxAQkCogPxZtVeXe1quPx3gVl9MRsDZfcHVKZAv9sTUbIHsBJPzpAAUcnr6FFjP5crziQBhzQFTJEp
- https://blogger.googleusercontent.com/img/b/R29vZ2xl/AVvXsEiNRkGAZUW-jBmFZWukbBZbfayPEr2e-9uyGEY5GUOeeD22EXYR8PmxtiAHQnJgkwCaBmgpqFwUZKj4rGxPsEoN5hZCiN7J7rGr2AWqAWZVfJ5Okld5Cfnc3ZHewpmH61Lz9hqd4Pb12y1dPLVmeTxJm17PIM003-S9NQqAVcjQokKQmGVMjYOyMVbK/s993/Connected%20App%20Detail%20Page.jpg
- https://www.marksgroup.net/wp-content/uploads/2019/05/console1.png